How to Change the Default Fonts and Line Spacing in Scrivener for Mac
I’ve been a Scrivener user for a little over a year now, and I’m on the learn what you need to know, when you need to know it, education plan. I started a new project this morning with several short scenes and realized I needed to reset the line spacing and font size each time I added a new scene. After the 4th scene, I’d had enough and set about trying to find a solution.
I assumed there would be some sort of project default, so I worked my way through the menus trying to find it. Nothing.
Okay, maybe there’s a way to reset the global defaults. It wasn’t super intuitive, but I eventually found the solution.
The solution
Here’s how to change the global defaults for font size and line spacing in Scrivener for the Mac:
1. Set up the correct font, font size and line spacing in the scene (editor) you’re currently using.
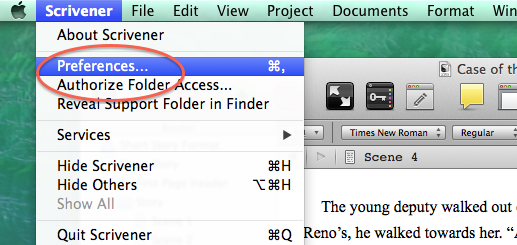
2. Go to Scrivener, and then Preferences.
3.Look along the top menu of the Preferences panel for the big A (formatting) and click it.
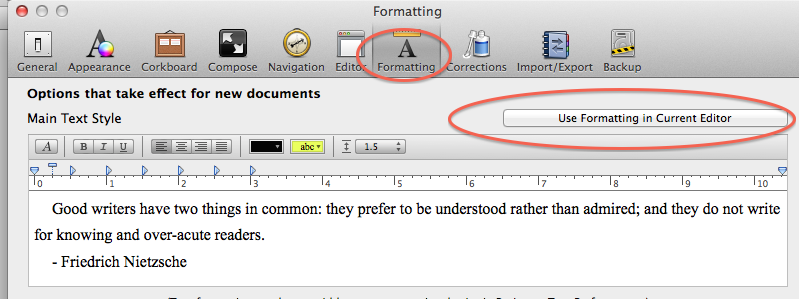
4. Click the button to “Use Formatting in Current Editor.” (Note - If this is grayed out please check to be sure you are in the correct editor - See the comment below from Kristen Elise for more details. Thanks, Kristen)
Click the button causes Scrivener to use the formatting that you’ve preset in step one as the global default for everything in Scrivener.
Now . . . back to my open project!